Crochet Paper Yarn Tote Bag – Easy Colorful DIY Tutorial
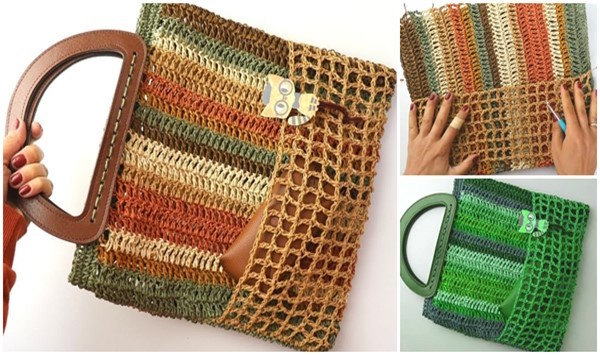
Crochet Paper Yarn Tote Bag is the ideal accessory for summer days, offering a stylish and eco-friendly way to carry your daily essentials. This handmade crochet tote bag project uses strong paper yarn in multiple colors to create a spacious, durable, and lightweight bag with a decorative mesh pocket in front. In this detailed tutorial, you will learn step by step how to crochet a colorful paper yarn tote bag, perfect for beginners who want to explore modern crochet techniques or experienced crafters searching for fresh ideas.
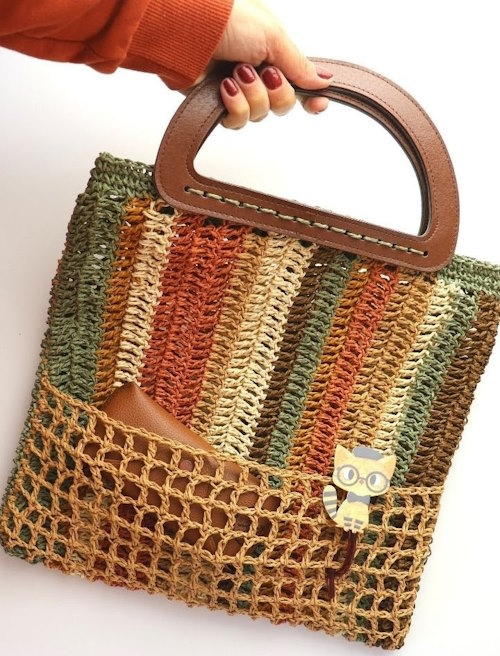
The Crochet Paper Yarn Tote Bag design combines eye-catching striped texture, practical storage space, and a unique handcrafted look, making it an excellent option for beach outings, shopping, or everyday use. With this DIY crochet bag pattern, you can customize the size, colors, and handle style to create a one-of-a-kind accessory that reflects your personal taste and showcases your creativity.
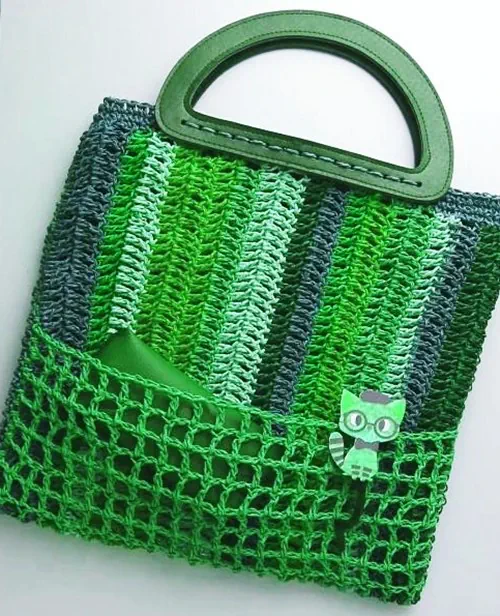
Crochet Paper Yarn Tote Bag – Materials and Preparation
Crochet Paper Yarn Tote Bag is a practical and modern project you can customize with different yarns and handle styles. Before starting, gather the essential supplies to make sure your handmade tote is sturdy, functional, and easy to carry.
You will need:
- Paper yarn in multiple colors (for a striped look) or a minimalist palette with two shades.
- A 4.5 mm crochet hook, which is ideal for paper yarn thickness.
- Wooden or faux leather handles for a finished look.
- Yarn needle and sharp scissors for seaming and trimming ends.
If you prefer alternative textures:
- Recycled cotton cord (5 mm hook) creates a softer, flexible tote.
- Raffia yarn (4–4.5 mm hook) adds a natural feel.
- Polyester cord (5–6 mm hook) offers strength and water resistance.
Tip: Always make a small swatch to test drape and gauge before you start.
Finished Size:
Approx. 33 cm tall, 32 cm wide, with a 12 cm front mesh pocket, roomy enough to carry everyday essentials such as sunglasses, wallet, and books.
Crochet the Main Body of the Handmade Crochet Bag
Handmade Crochet Bag Main Body is the essential foundation of this project, creating a sturdy rectangular panel that forms both the front and back of your crochet tote bag.
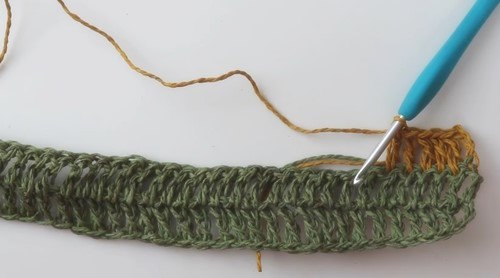
To begin, make a foundation chain by creating a slip knot and chaining 82 stitches. For a neat, professional edge that won’t curl, turn your chain and work into the back bumps instead of the front loops.
In the first row, skip the initial 3 chains — these count as your first double crochet stitch. Then, work 1 double crochet into each remaining chain across the row. When you finish, you will have 80 double crochets plus the turning chain, for a total of 81 stitches.
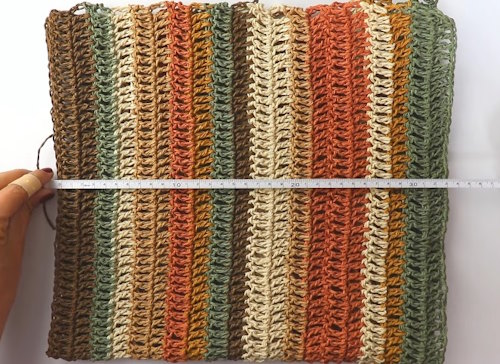
Next, chain 3 and turn your work to start Row 2. Crochet 1 double crochet into every stitch across the row. To create colorful stripes, switch yarn colors just before completing the last double crochet: pull through the final loop using your new color.
Continue repeating this process, alternating colors as you like. The tutorial suggests making 20 rows in total, but you can easily adjust the height by adding or reducing rows to fit your needs. Each row adds approximately 1.5 cm (0.6 inches) in height, depending on your crochet tension. Feel free to mix wide or narrow stripes for a creative, custom look.
This rectangular panel will build the main structure of your handmade crochet tote bag, giving it shape, strength, and a distinctive striped style that showcases your creativity.
Creating the Front Mesh Pocket of the Crochet Paper Yarn Tote Bag
Adding a front mesh pocket is both a practical and decorative detail that transforms your crochet paper yarn tote bag into a highly functional accessory with extra storage.
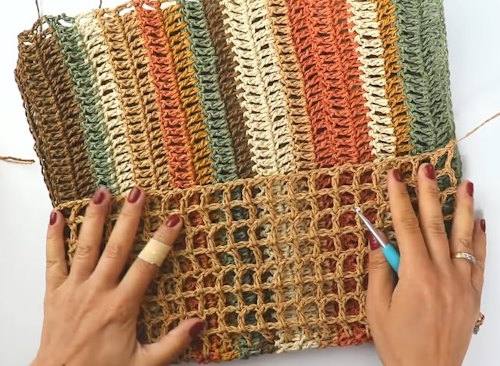
To begin, attach your yarn precisely at the spot on the main panel where you want the pocket to start. Usually, this placement is centered horizontally and about 5–7 cm (2–3 inches) from the bottom edge of the crochet paper yarn tote bag, but you can adjust to suit your needs. Chain 4 to create the foundation edge of your pocket.
Row 1:
Work around the posts of the double crochets from the main body panel to form a sturdy, open mesh structure. Around each post, crochet 1 double crochet followed by chain 1. Repeat this sequence across the entire row. At the end, you should have 21 double crochets separated by chain spaces, creating an airy and stylish mesh texture that enhances the look of your crochet paper yarn tote bag.
Chain 4 and turn your work.
Row 2 and Remaining Rows:
Skip the first stitch. Into each remaining stitch, crochet 1 double crochet and chain 1. This maintains a consistent mesh pattern and keeps the edges straight and clean.
Continue building the pocket until you have approximately 8 rows or a height of 12 cm (4.7 inches). This size is perfect for holding small items like sunglasses, keys, or earbuds you want to access quickly without opening the main compartment of your crochet paper yarn tote bag.
Finishing the Pocket:
Once you reach the desired height, chain 1 and fasten off the yarn securely. Use a yarn needle to weave in the yarn tail along the back of the stitches to prevent unraveling and give your handmade crochet paper yarn tote bag a polished finish.
By combining this structured tote body and the lightweight front mesh pocket, you create a unique crochet paper yarn tote bag that balances visual interest and practicality. This versatile design is ideal for shopping trips, vacations, and everyday use, offering a stylish handmade accessory that reflects your creativity.
Joining the Sides of Your Crochet Paper Yarn Tote Bag
To assemble your crochet paper yarn tote bag, start by folding the main panel neatly in half so the sides align perfectly. This preparation step ensures your handmade tote has a clean, symmetrical silhouette when finished and helps the crochet paper yarn tote bag hold its shape over time.
Steps to Seam the Sides of the Crochet Paper Yarn Tote Bag:
Count and Mark:
Along each side edge, count 40 stitches upward from the bottom edge and place a stitch marker. This will help you stop at the same height on both sides of the crochet paper yarn tote bag, keeping the seams even.
Attach the Yarn:
Using your hook, attach a fresh length of yarn at the very bottom corner. Pull the yarn through and chain 1 to secure it in place before you begin joining.
Seam with Single Crochet:
- Insert the hook through both layers of stitches to make sure they stay perfectly aligned.
- Work 1 single crochet into each stitch up to your marker.
- For added durability, when you encounter a double crochet post along the edge, insert your hook around the post itself instead of only through the top loops. This technique reinforces the seam so your crochet paper yarn tote bag remains strong and holds its rectangular form.
Repeat on the Other Side:
After you finish the first seam, fasten off the yarn securely. Repeat the same process on the opposite side panel, ensuring the edges match in height and tension.
By joining the sides this way, you create a professional, polished finish that supports the structure of your crochet paper yarn tote bag and helps it stand upright when filled with your daily essentials.
Attaching the Handles
Positioning:
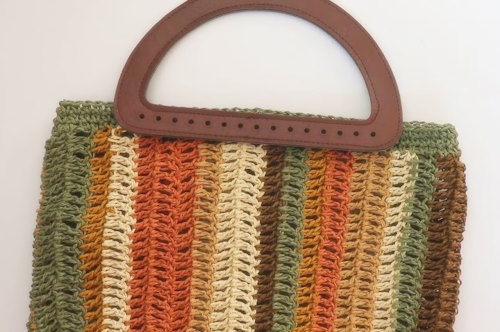
Center the handles on each side of the top edge, leaving equal space on both ends to balance the look and weight.
Sewing:
Use strong yarn or a double strand of matching thread to ensure the handles are firmly secured.
- Insert your yarn needle through the crochet stitches and around the handle loops multiple times.
- Knot the thread firmly on the inside of the bag.
- Hide the tails by weaving them between the stitches neatly.
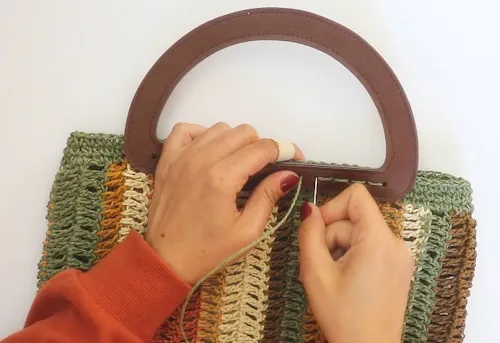
For added strength, reinforce the corners of each handle attachment point. This step is especially important if you plan to carry heavier items in your crochet paper yarn tote bag.
Tips and Suggestions for Customizing Your Crochet Paper Yarn Bag
This crochet mesh pocket tote is very adaptable. Here are a few ideas to help you make it uniquely yours:
- Size Adjustments:
If you prefer a larger tote, increase the number of foundation chains and rows proportionally. - Style Options:
For a minimalist look, choose a single color of paper yarn instead of stripes. - Strap Alternatives:
Instead of handles, crochet a long strap using a sturdy cord technique or attach pre-made leather straps. - Blocking:
Once the bag is complete, block it gently by stuffing it with towels and spraying lightly with water to help set the shape. - Pocket Variations:
You can crochet a deeper or narrower mesh pocket, depending on how you plan to use it.
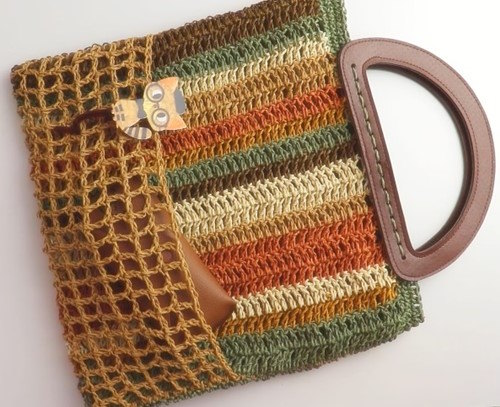
By completing these finishing touches, you will have a stylish crochet paper yarn bag that is both functional and beautiful—a handmade accessory ready for any season.
Finishing Touches and Final Thoughts
Your crochet paper yarn tote bag is now complete—a blend of functionality and handmade charm. Thanks to the sturdy paper yarn and practical mesh pocket, this project is both stylish and durable, perfect for everyday use or as a unique gift.
Remember:
- You can adjust the size and stripe pattern to suit your taste.
- Experimenting with different handle types or adding lining inside will further customize the bag.
- Always block your finished piece gently to shape it nicely.
Creating this handmade crochet tote bag not only builds your skills but also allows you to express your creativity in a practical way. Enjoy your new accessory, and happy crocheting!
Source Video: Sirin’s Crochet (YouTube)- This written tutorial has been prepared by DIYhearth.com.
